How to create maintenance schedules in MyGeotab
In this article you will learn how to create maintenance schedules in MyGeotab
1. On the left hand side of the screen, click on Maintenance
2. Click on schedules
3. Click on the blue + Schedule on the top right of the screen
4. Give the schedule a name
5. Click add
6. Enter maintenance categories for this schedule, this is an additional label that can be used for reporting
7. Select which groups can view or adjust this schedule
8. Select the applicable frequency criteria for this schedule
9. Choose how often maintenance should occur by time
10. Set a precise distance each vehicle should travel before the next scheduled maintenance
11. Set the number of running hours between maintenance to tailor schedules to each assets usage
12. Click save to confirm the base schedule settings
13. Click the schedule name to add assets to notification rules
14. Click on the add assets
15. You can filter by group to limit the selected assets down drop to assets in the chosen group
16. Select which assets to add to this schedule
17. Click add when finished
18. Click the add notification rule to customize how, when and who receives critical services alerts
19. Select the notification type this maintenance schedule should generate, such as messaging the driver via the drive app or emailing a user
20. Select which recipient this notification should go to if needed
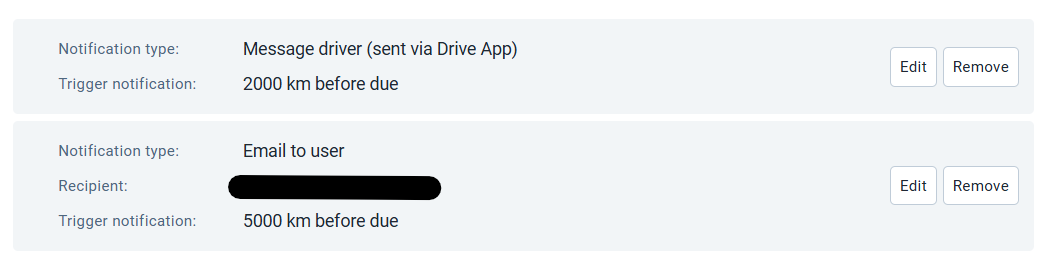
21. Enter the conditions that should trigger a notification
22. Click save
23. You can customize the notification message by clicking edit message
24. If you no longer want to use this maintenance schedule, you can select delete or archive under the schedule options
25. Click save when finished
26. When a vehicle becomes due for a scheduled maintenance, it is listed on the requests tab of the work order management page
Related Articles
How to create work orders in MyGeotab
In this article you will learn how to create work orders in MyGeotab. 1. On the left hand side of the screen, click on maintenance 2. Click on work order management ** Work requests come forma variety of sources such as: - Maintenance schedules - ...How to Add Users to MyGeotab
In this article you will learn how to add users on MyGeotab. On the left hand side of the screen: 1. Go to People 2. Users and Drivers 3. Top right of the screen, click the blue plus mark to add a new user 4. For the Username, enter the users email, ...How to create work requests in MyGeotab
In this article you will learn how to create work requests in MyGeotab. 1. On the left hand side of the screen click on maintenance 2. Click on work order management 3. Click on the blue + work request, on the top right hand side of the screen 4. ...How to Add Assets in MyGeotab
In this article you will learn how to add assets on MyGeotab. 1. Go to the Assets page in the right hand side of the screen 2. Click on the blue plus mark in the top right of the screen 3. Click on Single Asset 4. Enter the asset name 5. Enter the Go ...How to create groups in MyGeotab
In this article you will learn how to create groups in MyGeotab. 1. Go to groups and rules on the left hand side of the screen 2. Select Groups 3. Locate where you want to add a new group 4. Click the plus sign to create a group in that location 5. ...